Posts

Setting up RabbitMQ MQTT broker with for 2-way SSL

Image
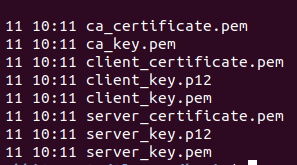
I wrote this tutorial because of the problems which I have faced in setting up 2-way SSL in the Rabbitmq broker. Hope you can figure your problem easily by following this guide. In two way SSL both certificates are exchanged among server and client and both sides are verifying the certificates. First, we have to generate certificates let's user guide in the Rabbitmq documentation to generate certificates https://www.rabbitmq.com/ssl.html git clone https://github.com/michaelklishin/tls-gen tls-gen cd tls-gen/basic # private key password make PASSWORD=bunnies make verify make info ls -l ./result                                                                                                                 Then you will generate the following certificates Next, you have to edit the rabbitmq.conf and advanced.conf to setup these certificates in rabbitmq.conf Add following config ( location /etc/rabbitmq/rabbitmq.conf )

Microservices basics

Image
Microservices development is about is making the architecture at a component level work the way good development practices and well modularization the code. In simple definitions, microservices have the following characteristics. In this article, we are focusing to see these in a more practical way. Smaller scoped units of work Scale independently among other components without affecting them Focus on data and business or function domains Before going to the design patterns lets define basics for the microservices These terms can be explained via a simple example. Think about a pizza delivery system. 1. Data Service will be a product, customer in this pizza delivery system.  2. Business service is defined by data services from a business perspective. Business services can be built on a single data domain or multiple data domains. As an example order domain, we can say as business services which uses product data and customer data and also you will

Firebase Cloud Messaging with Flutter - easy steps

Image
Hi, today I'm writing this article because of some difficulties which I have faced in integrating cloud functions into my Flutter mobile app. Here what I'm going to do is trigger a notification from firebase cloud function and push notification in the flutter app. I hope you have done the basic setup in the flutter app as firebase_messaging documentation says as below. No need to repeat the same thing so I'm going to dive directly to the changes you needed. https://pub.dev/packages/firebase_messaging After setting up the flutter environment as the documentation says you have to set a topic to subscribe for that notification. Here inline 50 in main.dart file, I have subscribed to a topic called 'News' which is the topic which I need to push messages in the cloud function. Then in your cloud functions, you have to send the message like following. First, create a separate function which can send push notifications. Here also you need to set the same

Introduction to reactive programming

Image
Introduction to reactive programming Most of the data stream had gone to become the spine of your particular application when you are using the programming of reactive. There are calls, messages, events, and other failures that are conveyed by the stream of data. You can also observe with the react and flows as the value is emitted with the programming of reactive. You can also create data streams in your code from anything and of anything, for example, cache events, notifications of availability, ingested messages, requires of HTTP, and sensor measures that would happen or change. It would be the most exciting effect on the application as it becomes asynchronous inherently. The bites of misused asynchrony  There is an essential concept in the programming of reactive that is asynchronous. Every developer would be notified that the data emitted in-stream asynchronously as it is independent of program flow. You can also write the code that is invoked as the stream may emit the

How to fix FirebaseApp with name [DEFAULT] doesn't exist issue with flutter

Image
How to fix FirebaseApp with name [DEFAULT] doesn't exist issue with flutter This is a very common issue when we try to google authenticate our app with flutter. Please check the following are done in your app. Updated the android build.gradle file Updated the android\app build.gradle file Added dependency to pubspec.yaml Placed the google-services.json file Check Updated the android build.gradle file Add the following line to the android/build.gradle file please add the following line to that file. classpath 'com.google.gms:google-services:4.3.2' // Google Services plugin Check Updated the android\app build.gradle file Add following line to the following location apply plugin : 'com.google.gms.google-services' Check Added dependency to pubspec.yaml firebase_auth : ^0.14.0+5 google_sign_in : ^4.0.7 Placed the google-services.json file make sure you have added google-services.json from the firebase

GSOC project with GENIVI Development Platform

Image
I have selected the Google Summer of Code 2017 program to work with the organization GENIVI Development Platform. GENIVI hosts a suite of Open Source Projects that focus in non-differentiating elements of the software stack of an In-Vehicle Infotainment system. These elements form a reusable software foundation for the efficient development of unique automaker and supplier offerings.       All GENIVI Open Source Projects operate as a  Community  using Open-Source best-practices, where contributors are welcome and  discussions  are encouraged. My task was to Incorporate the Zebra JavaScript framework into GDP for HTML5-based UIs The project aims to bring into the GDP a Javascript "canvas" library of UI elements. The goal is to show a possible approach to developing a Javascript-based UI for the GDP and automotive IVI systems. The tool chosen for this work is called Zebra. The GENIVI Development Platform is an open-source platform for building, testing and

Forward serial data between virtual serial ports in Node.js using socat

Image
I'm sharing this with you because I have faced some difficulties when I try to get data from virtual serial ports to my backend in the project . It's easy Part 1 . Installation: Download the tty0tty package from one of these sources: http://sourceforge.net/projects/tty0tty/files/ clone the repo  https://github.com/freemed/tty0tty git clone https://github.com/freemed/tty0tty Extract it tar xf tty0tty-1.2.tgz Build the kernel module from the provided source cd tty0tty-1.2/module make Copy the new kernel module into the kernel modules directory sudo cp tty0tty.ko /lib/modules/$(uname -r)/kernel/drivers/misc/ Load the module sudo depmod sudo modprobe tty0tty You should see new serial ports in /dev/ ( ls /dev/tnt* ) Give appropriate permissions to the new serial ports sudo chmod 666 /dev/tnt* You can now access the serial ports as  /dev/tnt0  (1,2,3,4 etc) Note that the consecutive ports are interconnected. For example, /dev/tnt0 and /