Posts

Simple Internet Of Things (IOT) Project For Home ( Part 2)

Image
          More On Configuring the Raspberry pi with Raspian OS Hello, this is my 2nd post on iot for a home project. I thought that it will be good to give you some idea about Raspberry pi and its configurations in this tutorial. Actually Raspberry pi is a small computer which runs Linux kernel. We use Arduino and PIC for electronics but the difference with Rpi is Rpi has a processor. But Arduini and PIC are Micro Controllers. Mirco Controllers does not have much performance like Rpi.  The  Raspberry  Pi   on the other is a complete, functional, mini-computer. It requires an  operating system  . Storage is provided from a micro-SD card. Although the Arduino can be programmed with small C-like applications, it cannot run a full scale “operating system” and certainly won’t be replacing your media centre anytime soon. The  Raspberry Pi,   on the other hand, is a computer.  For this pro...
Simple Internet Of Things (IOT) Project For Home (part1)

Image
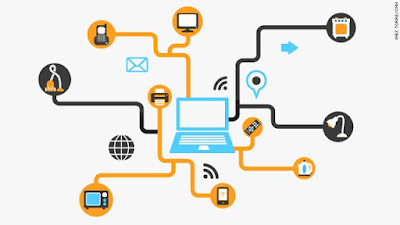
This is a simple project we have done in Short Semester. You can try this at home. Trust me this is simple with some little coding. But in part one we are done some small job. But this small step has the essence of the big idea of IOT. First Let's see what is the IoT concept... The  Internet of Things  ( IoT ) is the network of physical objects or "things" embedded with electronics, software, sensors, and network connectivity, which enables these objects to collect and exchange data. Above definition is on the Wikipedia. So let's get the simple idea of it. In IOT we are making every day-today equipment as a thing of the internet. So as an example imagine if you want to lit a bulb of your home when are in your office you can do it with this technology... okay, I think its enough with definitions... Let's keep our hands dirty..... What you will need for part 1 ??? In this part first, we are creating the IOT hub. Which is the box which we use to conn...

Building Zebra (zebkit) packages inside the GDP

Zebra(zebkit) library that follows easy OOP concept, provides HTML5 Canvas based Rich UI  So to add this to the GDP my GSOC mentors asked me to learn how to write recipes in kernal.  So I followed some tutorials and Documentations and also with the community support. With that help, I generated the kernel recipe using  Recipetool   https://wiki.yoctoproject.org/wiki/TipsAndTricks/NPM Under the hood, devtool runs  recipetool create  with the same fetch URI. Recipe tool downloads each dependency, capturing license details where possible and generates a recipe file. The recipe file is fairly simple but will contain every license that recipetool has found and include it in the  LIC_FILES_CHKSUM . Many node modules have unclear licensing so you'll see "unknown" in the LICENSE field. Have a look at the modules not listed. Using recipe tool I generated the recipe file see this GitHub patch https://github.com/akilawickey/meta-genivi-dev/commit/94f...

Building the GENIVI Development Platform

I started to learn core things with GDP (GENIVI Development Platform). I followed Documentations and tutorials on yocto and bitbake to learn about the platform. My mentors helped me to get familiar with the environment. Clone the GENIVI Development Platform https://github.com/GENIVI/genivi-dev-platform  and start building it inside my laptop. But it was so long process so I asked my university to access the high-performance server and started building the project. To initiate and build the environment used following commands given by the Documentation 1: https://github.com/GENIVI/genivi-dev-platform.git 2: cd genivi-dev-platform 3: source init.sh qemux86-64 First time building I got some proxy issues in the department server. But fixed them and finally successfully built the GDP in the server. My next step is to include zebra packages inside the GDP. For that, I have to write a recipe for the kernel.

Running Zebra Sample application

Image
After building zebra to the GDP mentors asked me to develop some test app for zebra. Since there is no HTTP server in the GDP   ( https://at.projects.genivi. org/jira/browse/GDP-709 ) mentors asked me to run and test this inside my pc. This is a sample application which draw a canvas in HTML 5. https://github.com/akilawickey/zebra/blob/master/test.html First clone the repository git clone https://github.com/akilawickey/zebra.git Then  npm install Then start http server using gulp http Then navigate to the the link http://localhost:8090 on your browser you can see test.html inside the gui then run it. 1 2 3 4 5 6 7 8 9 10 11 12 13 14 15 16 17 18 19 20 21 22 23 24 25 26 27 28 29 30 31 32 33 34 35 36 37 38 39 40 41 <!DOCTYPE html> <html> <head> <!-- Zebra Sample application --> <script src= 'http://repo.zebkit.org/latest/zebra.min.js' ...