IOT Greenhouse project part 1
How to build Simple IOT Greenhouse (Part 1)

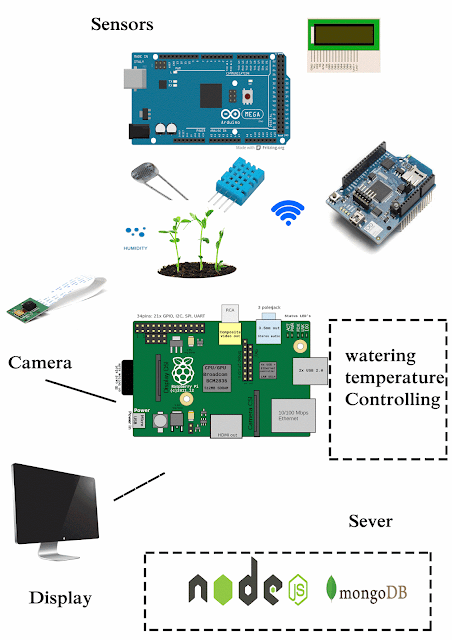
This this project we are going to control a stable environment to the plant inside the greenhouse. With using mqtt protocols and latest IOT suff. And also we can monitor plant conditions using digital image processing. So let's start this step by step. Part 1 is all about setting up the sensors and hardware part.
So what do you need to this project ?
Components
1.) Arduino Uno with wifi shield
2.) Raspberry PI 2 Board and wifi adapter.
3.) DHT 21 (AM2301) Temperature and humidity sensor
4.) Soil Moisture Sensor
5.) Light intensity sensor
6.) Water pump
7.) Raspberry PI Camera or web cam for image processing
8.) 16 in to 4 LCD display
Don't be scared i'm going to explain bit by bit how to build this system.
First of all you have to design the hardware part. plug the sensor to the arduino in correct way.
Simple Arduino Code to get sensor data and display here this code is without the arduino wifi data transmission.Try it and change it according to your needs.
https://github.com/akilawickey/iot_greenhouse/blob/master/greenhouse_arduino.ino
After clearly plug your sensors and upload this code to the arduino you can have a result like this.
Next day we will learn some stuff about how to send these data to raspberry pi.
and Other networking stuff with Networking.


Can u give us more details please
ReplyDeleteCan we use rasbperry pi 3 b+ model in place of rasbperry pi and arduino wifi shield
ReplyDeleteDo u have research papers on this please mail me LAL.kamlesh928@gmail.com
ReplyDeleteWhat are the dimensions of each plexi glass???
ReplyDelete