Posts

Showing posts with the label technology

Node.js how to work with Serial ports and display data on a beautiful frontend using Highcharts API Part 2

Image
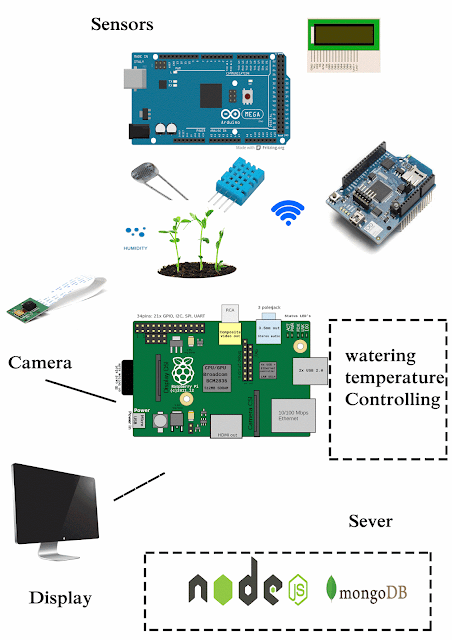
Now you have some basic idea of the technologies we are using here. So let's get our hands dirty. First, we have to set up the Node js libraries correctly to handle the serial data and open a WebSocket. So simple what we here going to do is getting data from USB and put them into a GUI to visualize our data nicely. So for this tutorial, I'm going to use Arduino as my data source. Piratically this will be your sensor or devices which you are using. Here http://www.highcharts.com/  Highcharts makes it easy for developers to set up interactive charts in their web pages. This has good community support and this is best for our works. 1. First step clone this repository https://github.com/akilawickey/nodejs-serial-frontend/tree/master Here is the Arduino sketch sample.ino which I'm using to emulate data which you can find inside the repository 1: /* 2: * This code will emulate USB data 3: * 4: * 5: */ 6: // the setup function run

Node.js how to work with Serial ports and display data on a beautiful frontend using Highcharts API Part 1

Image
Today I like to share something with how to use our embedded systems and web technologies. Our visualizing part is so important because thats how end users see our embedded systems real output. So there is no point if we cannot show our embedded system output to the users in a nice way. If you are not familiar with Node.js don't worry just do some googling and run a Hello World you will be fine. :-) http://nodeguide.com/beginner.html Our final goal is to display our sensor data in a front end like this Node.js is an Event-driven I/O server-side JavaScript environment based on V8. Includes API documentation, change-log, examples, and announcements. So by using this technology, we can do a lot of things.  You don't need to worry much about coding because developers have been developed this amazing environment to use in various sides and areas. As an example if you need some coding GUI building it has a library called express, if to you want to do a text to spee

IOT Greenhouse project part 3 (Working prototype of IoT Greenhouse)

Image
   This is the promotional video which we have done to the Embedded systems project. Presentation slide   https://docs.google.com/presentation/d/1Ep9eNl-nSVVVAHae62GMqLgg84za-thUbyO-UmZ19PA/edit?usp=sharing  This project we are monitoring and controlling a Greenhouse. By analyzing monitored data and digital image System will control the Greenhouse. Here we have developed a working prototype with one plant. Here our main goals wer e Light and watering control, Temperature and humidity Controlling, Image processing to monitor leaves of the and infections, Automatic management and remote monitoring. The client can have the latest status of the greenhouse. Here we have used the MQTT protocol because it is a lightweight messaging protocol. Here each sensor has a topic. As an example humidity sensor has topic greenhouse/1/hum other sensors also have. So here Arduino UNO + WIFI shield is acting as an MQTT client and publish this sensor data to the related topics. Then

IOT Greenhouse project part 2

Image
here you can see how hardware has been connected and how Networking part is happpening  Here our main goals wer e Light and watering control,Temperature and humidity Controlling , Image processing to monitor leaves of the and infections , Automatic management and and remote monitoring. Client can have latest status of the greenhouse . Here we have used MQTT protocol because it is lightweight messaging protocol . Here each sensor has topic. As an example humidity sensor has topic greenhouse/1/hum other sensors also have. So here Arduino UNO + WIFI shield is acting as a MQTT client and publish this sensor data to the related topics . Then in Raspberry PI there is MQTT server and from the PI data will be put into a Graphical user interface .So any user with proper authentication can connect to the IP of the raspberry and get these data. So i think you have some idea about the hardware part. Next  we are planning to do the Controlling part and Image processing part to the Gre

IOT Greenhouse project part 1

Image
How to build Simple IOT Greenhouse (Part 1) This this project we are going to control a stable environment to the plant inside the greenhouse.  With using mqtt protocols and latest IOT suff. And also we can monitor plant conditions using digital image processing. So let's start this step by step. Part 1 is all about setting up the sensors and hardware part. So what do you need to this project ? Components 1.) Arduino Uno with wifi shield 2.) Raspberry PI 2 Board and wifi adapter. 3.) DHT 21 (AM2301) Temperature and humidity sensor 4.) Soil Moisture Sensor 5.) Light intensity sensor 6.) Water pump 7.) Raspberry PI Camera or web cam for image processing 8.) 16 in to 4 LCD display Don't be scared i'm going to explain bit by bit how to build this system. First of all you have to design the hardware part. plug the sensor to the arduino in correct way. Simple Arduino Code to get sensor data and display here this code is without the arduino w

Simple Internet Of Things (IOT) Project For Home ( Part 2)

Image
          More On Configuring the Raspberry pi with Raspian OS Hello, this is my 2nd post on iot for a home project. I thought that it will be good to give you some idea about Raspberry pi and its configurations in this tutorial. Actually Raspberry pi is a small computer which runs Linux kernel. We use Arduino and PIC for electronics but the difference with Rpi is Rpi has a processor. But Arduini and PIC are Micro Controllers. Mirco Controllers does not have much performance like Rpi.  The  Raspberry  Pi   on the other is a complete, functional, mini-computer. It requires an  operating system  . Storage is provided from a micro-SD card. Although the Arduino can be programmed with small C-like applications, it cannot run a full scale “operating system” and certainly won’t be replacing your media centre anytime soon. The  Raspberry Pi,   on the other hand, is a computer.  For this project, I'm using the  Raspberry Pi Model B + It has the follow

Simple Internet Of Things (IOT) Project For Home (part1)

Image
This is a simple project we have done in Short Semester. You can try this at home. Trust me this is simple with some little coding. But in part one we are done some small job. But this small step has the essence of the big idea of IOT. First Let's see what is the IoT concept... The  Internet of Things  ( IoT ) is the network of physical objects or "things" embedded with electronics, software, sensors, and network connectivity, which enables these objects to collect and exchange data. Above definition is on the Wikipedia. So let's get the simple idea of it. In IOT we are making every day-today equipment as a thing of the internet. So as an example imagine if you want to lit a bulb of your home when are in your office you can do it with this technology... okay, I think its enough with definitions... Let's keep our hands dirty..... What you will need for part 1 ??? In this part first, we are creating the IOT hub. Which is the box which we use to conn